
Introduction
People are familiar by now with the Mastodon account verification system: if you want to prove that you own both a particular Mastodon account and a particular website
By owning I mean you hold the login credentials.
, you add a link with the rel="me" attribute to your website pointing back to your Mastodon profile and in the Mastodon profile you add a link to your website page that contains that rel="me" anchor. The Mastodon instance will fetch that page, find the rel="me" anchor and reward you with a green checkmark next to your website link in your Mastodon profile. This is very simple and straightforward but it does imply a certain level of trust in the Mastodon instance doing the verification.
If you wish, you can take the account linking verification further. Let’s say you own a public-private key pair and want to somehow link that to other internet identifies, be it websites, social media accounts, DNS domains etc. Basically you want to establish that you, the owner of this public-private key pair also own credentials to these other internet identities. Keybase offers this sort of identity proof Zoom acquired Keybase and its future is unclear. Mastodon has deprecated Keybase identity proofs. .
If you have a plain old PGP key pair lying around, you can also do a similar identity proof by taking advantage of annotations to a public key that can only be added and modified if you hold the associated private key. Anybody can verify that a public key has a given annotation. If you then take a fingerprint of the public key and add it to a publicly accessible place on your internet identity, you will have established a link between the key pair and the internet identity. This is exactly what Keyoxide proposes.
For this to work well, there need to be agreed upon places where the public key fingerprint is placed for a given internet identity (so an independent verifier can find the fingerprint). Also the format of the annotation needs to be agreed on, again so an independent verifier can find the internet identity to be verified from the annotation data. Keyoxide specifies these things and hopes that its specification will be adopted I am not associated with the Keyoxide project and have no idea how far along the adoption is. .
If you want to know how to use Keyoxide, I have some snippets here that you can use (I’m writing these down for my own memory. It’s easy to forget these incantations.)
I will assume you already have GPG installed and have generated a key pair. If you’re using a Mac computer, a good package is GPGTools (I personally find it valuable and pay for the subscription even though I have hardly anyone I communicate with that uses PGP). It has a nice Mail.app plugin and a reasonable keychain management Mac app.
We will use the gpg cli in a terminal to do all the following operations.
Finding your public key fingerprint
To find the fingerprint of one of the keys in your keychains, you do
gpg --list-keys
The output will be something like this:
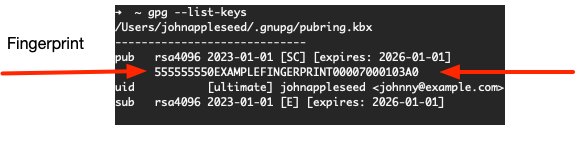
That long string of hexadecimal digits is the fingerprint. In this example I pasted a placeholder where some of the digits are not valid hexadecimal but I will use this example string 555555550EXAMPLEFINGERPRINT00007000103A0 in the commands that follow. You should replace this example placeholder with your real fingerprint when you use the commands.
Adding the public fingerprint to your identities
How the public fingerprint is added is part of the Keyoxide specification. We will cover three internet identity types: a Github account, a DNS domain and a Mastodon account.
Github
Create a Github public gist with the following contents (remember to use your real fingerprint in the place of the example one):
This is an OpenPGP proof that connects [my OpenPGP key](https://keyoxide.org/555555550EXAMPLEFINGERPRINT00007000103A0) to [this Github account](https://github.com/johnnyappleseed). For details check out https://keyoxide.org/guides/openpgp-proofs

[Verifying my OpenPGP key: openpgp4fpr:555555550EXAMPLEFINGERPRINT00007000103A0]
The important part for verification is openpgp4fpr:555555550EXAMPLEFINGERPRINT00007000103A0. The rest is just explainer so you know what this gist is about.
Remember the link to this gist. We’ll need it later.
DNS
I cannot really help you here. You need to achieve this: add a TXT record to your domain DNS records. You most likely can do this in the admin section of your domain name provider’s website. The TXT record needs to look like this:
- type: TXT
- host: @
- value: openpgp4fpr:555555550EXAMPLEFINGERPRINT00007000103A0
Mastodon profile
Edit your Mastodon profile, and in the Profile metadata section add key keyoxide and value openpgp4fpr:555555550EXAMPLEFINGERPRINT00007000103A0.
Annotating and uploading the public key
Use this command to enter an edit session (remember to use your real fingerprint in the place of the example one):
gpg --edit-key 555555550EXAMPLEFINGERPRINT00007000103A0
This puts you in a gpg shell where you issue subcommands. What follows is inside that gpg shell (you can type help in this minishell at any time to see the available commands, quit gets you out):
gpg>list
This will list the gpg identities associated with the key (it usually is just one, so we will assume that)
We will select it:
gpg>uid 1
To add a annotation do:
gpg>notation
You can then enter a key-value pair string separated by =.
To see all the notations:
gpg>showpref
To save the annotation and exit the gpg shell:
gpg>save
We now want to upload the newly annotated public key to a keyserver (we’re back in the normal terminal shell):
gpg --keyserver hkps://keys.openpgp.org --send-keys 555555550EXAMPLEFINGERPRINT00007000103A0
This will upload the key to keys.openpgp.org.
But hold on. We haven’t said yet what the actual annotation should be. So yes, this is where the Keyoxide specification comes in. Adding annotations is common GPG functionality but what the actual annotation value should be has to be agreed on, so verifiers can do their job. We will again cover three internet identity types: a GitHub account, a DNS domain and a Mastodon account.
Github
For Github the annotation needs to be
proof@ariadne.id=https://gist.github.com/johnnyappleseed/009222334893408222197e2225ac13e2
Replace the example placeholder there with the link to the actual Github gist you created in the previous section.
DNS
Here the annotation is:
proof@ariadne.id=dns:johnnyappleseed.com?type=TXT
Replace johnnyappleseed.com with your actual domain.
Mastodon
The annotation is:
proof@ariadne.id=https://some-example.mastodon.instance/@johnny
Replace the placeholder with a link to your Mastodon profile.
Verifying identities
After all this work, what have we achieved? Well, if I want to verify that your public key is associated with a given Mastodon profile, I can download the public key, look at all the annotations and find a link in there to a Mastodon profile. If when I visit this profile I see the fingerprint of the public key I just downloaded, then I verified the link between the two. This can all be done by independent verifiers with relatively simple cli commands.
If you trust the Keyoxide website then you can save yourself all this work and verify an identity by just pasting the fingerprint (or the email address from the public key) into the View profile textfield. Keyoxide will do all the verifications for all the annotations for you (assuming the public key has been uploaded to keys.openpgp.org).
Keyoxide specifies a whole bunch of identities it can verify:
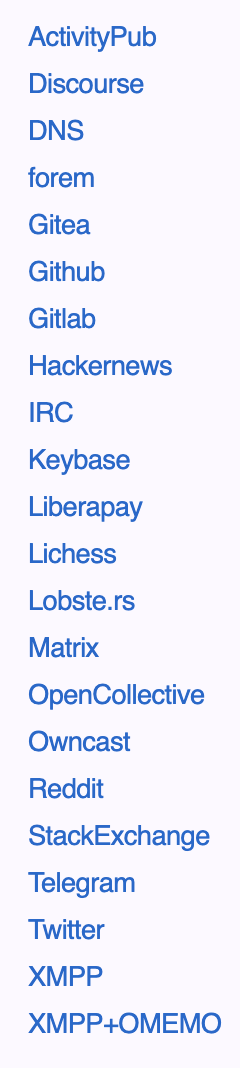
The important thing is that it can find text snippets like this openpgp4fpr:555555550EXAMPLEFINGERPRINT00007000103A0 in agreed upon places and those places are declared as annotations in the public key. That’s basically it.